Painting Furniture with 10 Second Sanding
Engineer's Print 101
|
|
Note: The Engineer's Print is just like a very large black & white photocopy of your picture. Do not expect high photo quality. However, it's a fun & inexpensive way of updating your family photos. Next time, I'll wrap the engineers print around a canvas to give it a more substantial appearance.
|
|
Pillow Painting
No Sew Throw Pillows
|
|
I just recently discovered No-Iron Fabric Tape and let's just say it's the best invention ever for people who dislike sewing. It really works-you simply press the tape on the fabric with no ironing needed! Wish I had it for this project!
|
|
|
Here is a photo of that Fabric Tape I was telling you about. I used it for my No Sew Custom Drapes Project in my Master Bedroom. I need to buy this stuff by the caseload! :)
|
No Sew Custom Drapes
|
|
I really like how these drapes (and the entire room) turned out! It looks like I spent a lot more money! I spent about $18 on each tablecloth (Target) and I bought two blanket ribbons (Walmart) for about $3 each. I made the pillows from cloth table napkins (Target) with Fabric Fuse and that tutorial will be on my blog soon.
|
Master Bedroom "Beach House Redesign"
|
|
My Master Bedroom went from dark to bright & bold patterns! Yeah! Welcome my Nautical/Beach/Coastal Lovers! I'm a lover of bold patterns and I enjoy mixing & matching patterns! I'm in love with this result! Who knew taking simple tablecloths and using them as drapes could be so cost effective and so good looking!
|
|
|
Bring on the color baby! Can you feel the ocean breezes?
|
How To Hang Real Starfish
|
|
Right now, I'm in love with all things nautical/beach/coastal! And I've decided to redecorate my entire house-I call it my "Beach House Redesign." No, I'm not lucky enough to live on the beach, but I am lucky enough to have the beach nearby! Slowly & cheaply (Is that a word?), I'll redecorate each room of my house and let you see the process. My husband is going to love me or rather hate all of the work I'm going to try and get him to help me with! :) But, he'll love the results! The niche above is in our Master Bedroom Entry.
|
Modge Podge Mouse Pad
|
|
I did this project in about 20 minutes last night and it worked!
This was my first time using Modge Podge and I'm certain I'll be using it a lot in the future!
Leave me a comment below! :)
|
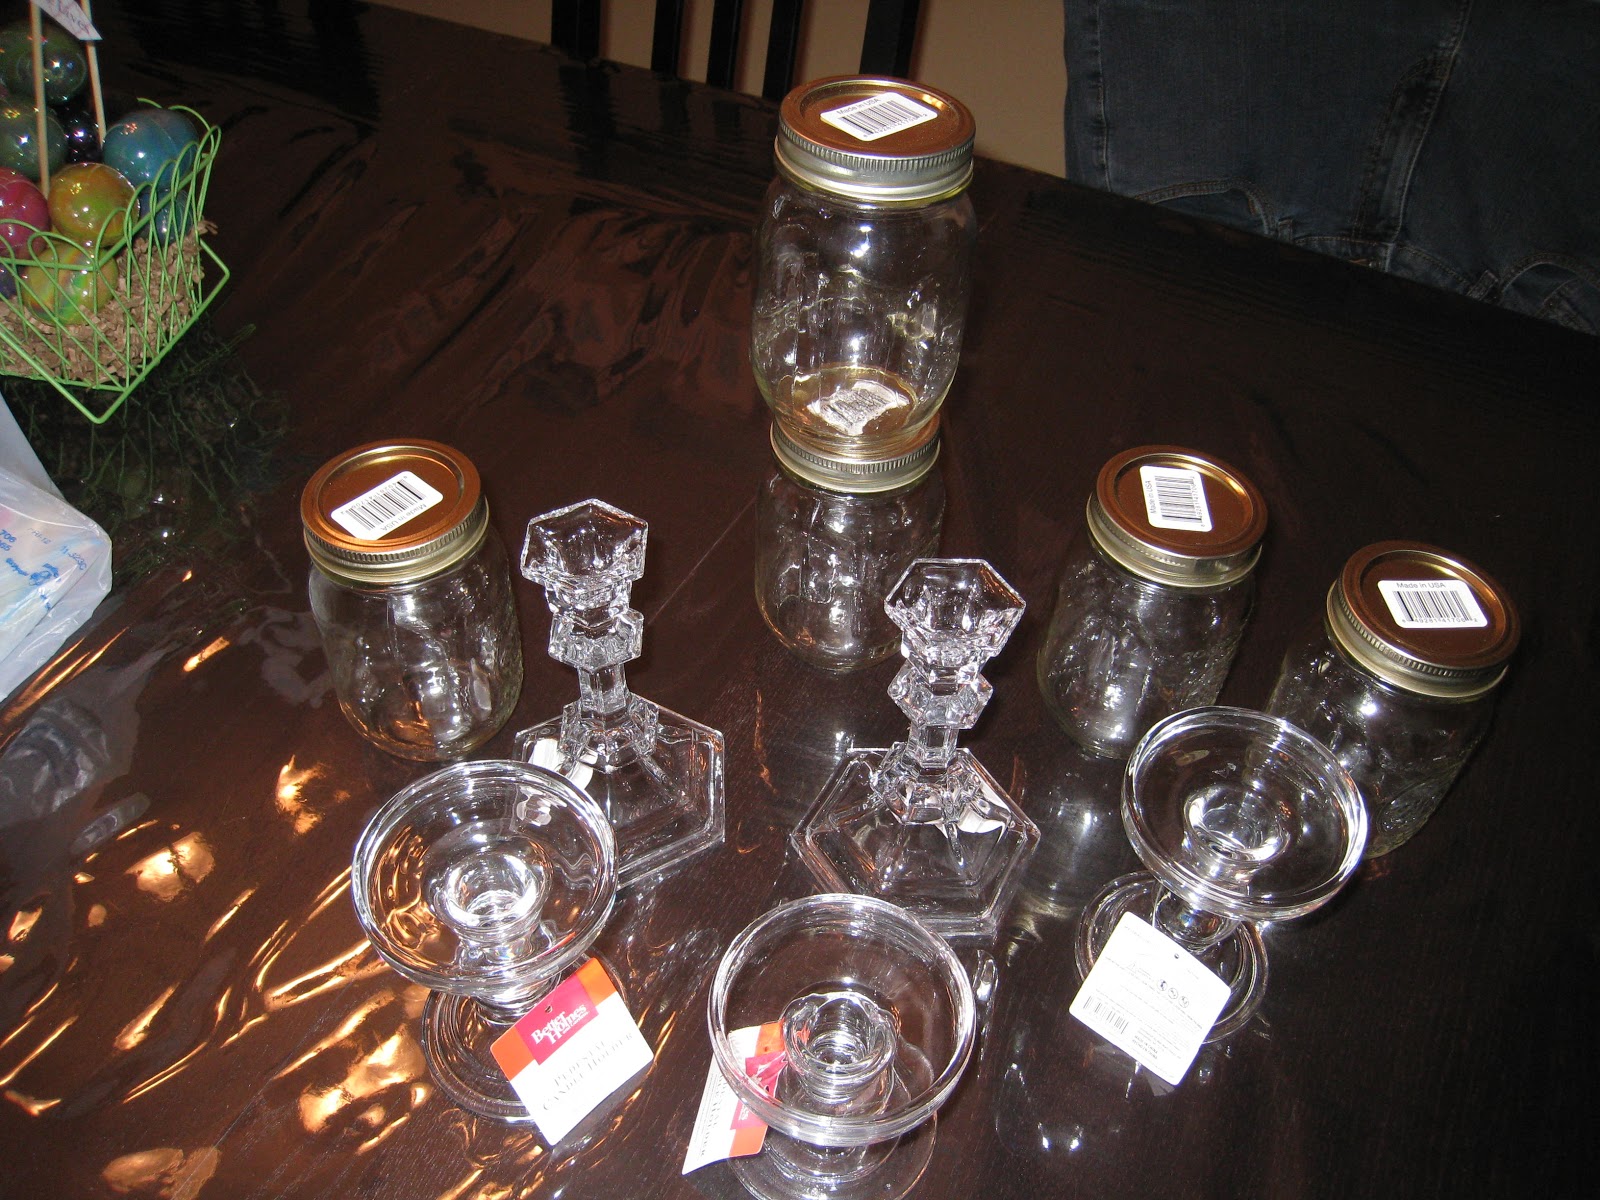
DIY Candy Display Jars
|
|
I found this idea on Pinterest and I couldn't wait to make it for Easter!
|
|
|
First order of business...shopping! I bought five mason jars at Dollar Tree for $1 each and 5 different sized candle holders from Walmart varying in price from $2.50 to $4 each as well as Super Glue from the Dollar Tree.
|
|
|
I super glued the mason jars to the candle holders. Then I used vegetable oil to remove the sticky film left by the price stickers on the top of the mason jar lids. It worked great!
|
|
|
Here is one of my candy display jars on my table!
|
|
|
I placed some on my mantle for Easter too!
|
|
|
The candy is already almost gone from one jar because my husband and son keep eating them!
Happy Easter!
|

|
My Jewelry Hanger! I've been wanting to make one for a while now!
|
|
|
Step 1) Purchase a piece of plywood of your desired size. Mine had black paint all over it from use on another project.
|
|
|
Step 2) Lay out your knobs on the wood and space the knobs according to your liking. Mark the wood for holes.
Step 3) Drill holes all the way through the wood. This step took a while for me because I had a lot of knobs and I had to use some arm muscle!
|
|
|
Step 4) Paint the wood. I painted mine black first, let it dry, then painted on top of it with blue allowing streaks to show through.
|
|
|
Another view of my paint job.
|
|
|
Step 5) I wanted to add the words "Monica's Jewels."
So I used the free Picnik program online to create the words and flip them so it would read correctly.
|
|
|
Place the words on the wood.
|
|
|
Step 6) Use a wet (not too wet) paintbrush to paint over the words.
Then, use the end of a covered sharpie marker to rub over the words.
|
|
|
Can you see the words now that the paper has been removed?
I think it would have shown up better if I had used a drier paintbrush and waited longer for the blue paint to dry!
|
|
|
Step 7) Go over the words in paint mixed with water. I also added some stencils such as the starfish and seahorses. I then used my wet paintbrush and went across the entire piece of wood several times creating a more worn look.
|
|
|
Step 8) Add your knobs and ribbon to hang up your new jewelry hanger!
|
|
|
My finished DIY Jewelry Hanger! Looks pretty good, ha? :)
|

|
Dressing Up Kid's Table. I added this phrase with vinyl sticky letters that were purchased from Target.
It's an old sofa side table (I painted the legs blue) that I'm using for my son with toddler chairs in his surfer boy room.
|
|
|
It's an easy and fun way to dress up kid's furniture!
|

|
Painting Horizontal Stripes. I wanted to add a bold look and I love the look of these painted horizontal stripes!
|
|
|
Step 1) Measure and tape stripe outlines on to your wall. I used a ruler as my guide.
|
|
|
Notice the bed was white before? I painted it black creating a more masculine look for my son.
|
|
|
Step 2) Paint and remove tape once dry. Touch up paint without tape. Unfortunately, when I removed the tape, it peeled some paint off the wall ruining my straight lines! If I were to do this project over again, I'd purchase a clear paint and paint it along the edges of the tape and let it dry before applying the color.
|

|
No Sew Drapes. These no-sew drapes were made the same way as the bed skirt! First, I measured and cut the fabric. Then, I ironed on the no-sew tape to all four sides of the fabric creating a hem. Make sure both drapery panels are the same length. Attach drapes to rod using drapery rings with a clamp. Repeating the fabric throughout the room creates a cohesive and higher end look!
|

|