 |
| My Jewelry Hanger! I've been wanting to make one for a while now! |
 |
| Step 1) Purchase a piece of plywood of your desired size. Mine had black paint all over it from use on another project. |
 |
| Step 4) Paint the wood. I painted mine black first, let it dry, then painted on top of it with blue allowing streaks to show through. |
 |
| Another view of my paint job. |
 |
| Step 5) I wanted to add the words "Monica's Jewels." So I used the free Picnik program online to create the words and flip them so it would read correctly. |
 |
| Place the words on the wood. |
 |
| Step 6) Use a wet (not too wet) paintbrush to paint over the words. Then, use the end of a covered sharpie marker to rub over the words. |
 |
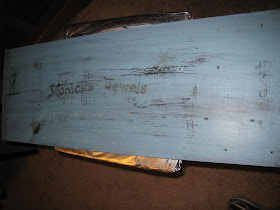
| Can you see the words now that the paper has been removed? I think it would have shown up better if I had used a drier paintbrush and waited longer for the blue paint to dry! |
 |
| Step 8) Add your knobs and ribbon to hang up your new jewelry hanger! |
 |
| My finished DIY Jewelry Hanger! Looks pretty good, ha? :) |

